
Tracking real-world location data does not always require expensive hardware or GSM modules. With ESPHome and an inexpensive GPS module, we can turn even a simple ESP8266 into a fully functional GPS receiver that pushes real-time data to Home Assistant.
In this post, I’ll walk through my setup, configuration, and final results.
Why ESP8266 for GPS?
Even though the ESP8266 is old, it still works beautifully with NMEA output GPS modules like:
- NEO-6M / NEO-7M / NEO-8M
- uBlox modules
- Generic UART GPS receivers
ESPHome has built-in GPS parsing support, giving us:
- Latitude
- Longitude
- Altitude
- Speed
- Course
- HDOP (accuracy)
- Satellite count
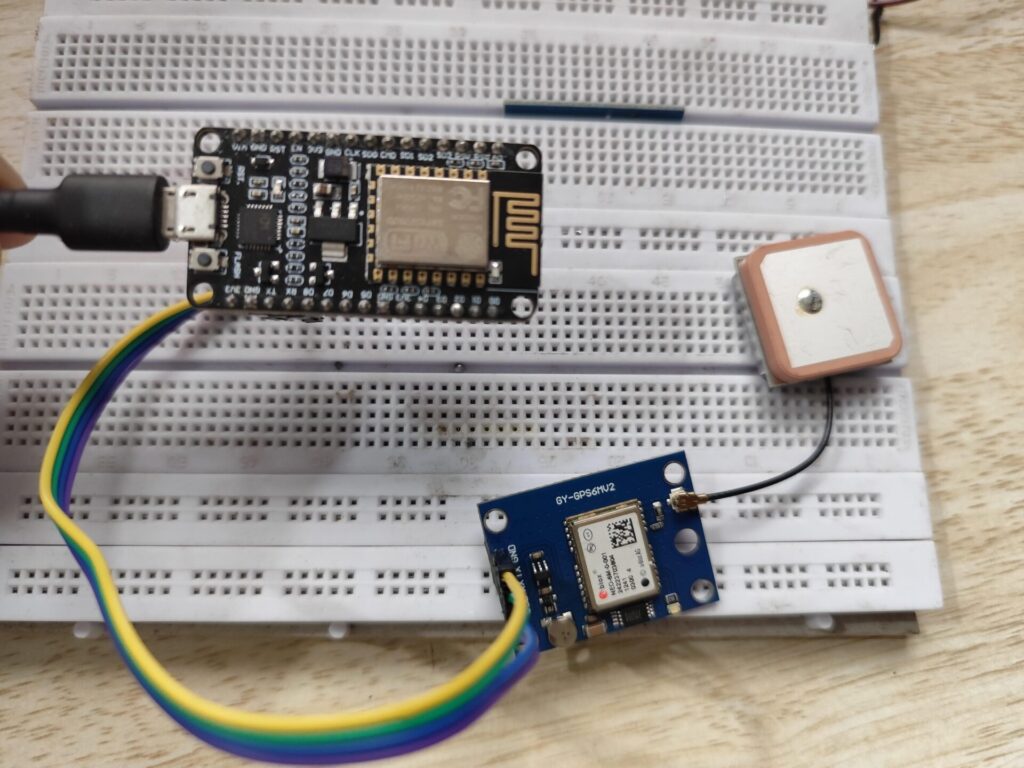
Hardware Used
- ESP8266 ESP-01
- uBlox GPS module (9600 baud default)
- 3.3V Regulated Power Supply
Connections used:
| GPS Pin | ESP8266 Pin |
|---|---|
| TX → | GPIO3 (RX) |
| RX → | GPIO1 (TX) |
| GND → | GND |
| VCC → | 3.3V |
ESPHome Configuration
esphome:
  name: esp8266-gps-test
  friendly_name: esp8266-GPS-Test

esp8266:
  board: esp01_1m

# Enable logging
logger:
  baud_rate: 0

debug:
# Enable Home Assistant API
api:
  encryption:
    key: "XXXXXXXXXXXXXXXXXXXXXXXXXXX"

ota:
  - platform: esphome
    password: "XXXXXXXXXXXXXXXXXXXXXXXXXXX"

wifi:
  ssid: !secret wifi_ssid_vlan40
  password: !secret wifi_password_vlan40

  # Enable fallback hotspot (captive portal) in case wifi connection fails
  ap:
    ssid: "Esp8266-Gps-Test"
    password: "XXXXXXXXXXXXXXXXXXXXXXXXXXX"

captive_portal:

uart:
  id: uart_gps
  tx_pin: GPIO1
  rx_pin: GPIO3
  baud_rate: 9600


gps:
  uart_id: uart_gps
  latitude:
    name: "GPS Latitude"
  longitude:
    name: "GPS Longitude"
  altitude:
    name: "GPS Altitude"
  speed:
    name: "GPS Speed"
  course:
    name: "GPS Course"
  satellites:
    name: "GPS Satellites"
  hdop:
    name: "GPS HDOP"
  update_interval: 20s

time:
  - platform: gps
Within minutes, the ESP8266 began pushing accurate GPS data directly to Home Assistant.
Sample Output in Home Assistant

Final Thoughts
This experiment proves that:
- GPS data integrates beautifully with ESPHome
- Home Assistant dashboards can easily visualize real-time position
- You can build a DIY tracker for extremely low cost
Next Enhancements – Integrating GPS Into My Cycling System
Since I already have a DIY Cycling Indicator + Horn system running on an ESP32-C3 (from my previous project), the next step is to bring this GPS data into the cycling setup and turn my Firefox Combat into a smarter, fully connected ride.
Here are the upgrades I’m planning:
1. Live GPS Tracking While Cycling
Instead of the ESP8266 sitting indoors, the GPS module will be mounted on the bike frame.
This allows:
- Real-time speed tracking
- Distance calculation using GPS instead of wheel sensors
- Automatic ride logging into Home Assistant
- A post-ride map view of my cycling route
Perfect for daily 30 km rides!
2. Integrating with Existing ESP32-C3 Cycling System
My current cycling setup has:
- ESP32-C3
- Indicators
- Horn
- Handlebar switches
- Power from a Li-ion battery
The plan is to merge the GPS module with the existing controller board, giving me:
- A single unified smart cycling system
- GPS-powered ride metrics
- Turn-by-turn navigation alerts (future update)
- Automatic start/stop ride logging
A Thank You Note to the ESPHome Community
Before ending this post, I want to express my genuine appreciation for the ESPHome team, contributors, and the entire open-source community behind it.
ESPHome continues to make DIY electronics beautifully simple — turning complex microcontroller programming into clean YAML that anyone can understand. From GPS parsing to sensor integrations, Wi-Fi automation, and seamless Home Assistant support, ESPHome truly empowers makers like me to experiment, learn, and build real-world solutions.